Configure Metadata Extraction
Alation Cloud Service Applies to Alation Cloud Service instances of Alation
Metadata Extraction (MDE) in dbt Gen2 OCF connector for dbt Cloud and Core fetches information such as projects, models, model columns, and job runs.
You can initiate MDE on demand or schedule it for regular catalog updates.
On the Settings page of your dbt Gen2 data source, go to the Metadata Extraction tab and perform these steps to configure MDE for a dbt Gen2 ELT source:
Fetch dbt Projects
Before fetching the projects for extraction, ensure that the service account has the necessary permissions to access required projects. For details, see the Generate a Service Account Token section in Prerequisites.
For dbt Core, ensure that you have set up the dbt project with all the required JSON files such as manifest.json, env_details.json, catalog.json (optional) and run_results.json (optional) in your project structure. For details, see the Prepare the Artifacts for dbt Projects in Prerequisites.
On the Metadata Extraction, go to the Fetch dbt Projects section.
Click Run.
The retrieved list of projects appears in the Projects table under the Select projects for extraction section of the Metadata Extraction page.
Note
Alation does not support the following projects and, hence, skips fetching them:
Projects with no environments
Projects with unsupported ELT sources in the
manifest.jsonandenv_details.jsonfiles. To know the list of supported ELT sources, refer to the Supported Data Sources section in Overview.Project with connection type as ODBC under the environment details
Select Projects for Extraction
Alation recommends selecting specific projects for extraction rather than extracting all projects. This ensures metadata is retrieved only for the chosen projects, making the process faster and more resource-efficient. Extracting all projects is only beneficial if you have a small number of projects and want to catalog them all.
By default, all projects fetched by Alation from the data source are selected. You can adjust the selection by:
Selecting Projects using Filters
Selecting Projects Manually
If you do not select any project manually or using rules, Alation extracts all the projects upon running the metadata extraction.
Select Projects using Filters
To apply extraction filters, perform these steps:
Under the Select projects for extraction section, enable the Enable advanced settings toggle.
From the Extract drop-down, select the extraction filter option you need.
Only selected projects — extracts metadata only from the selected projects. This is the default value.
All projects except selected — extracts metadata from all projects except the selected projects.
Select the Keep the catalog synchronized with the current selection of projects checkbox to soft-delete the projects from previous extraction that are not part of the current project selection.
Create a filter.
From the first drop down, select Project.
Select the filter criteria (Contains, Starts with, Ends with, Regex).
Specify the keyword to look for from the project.
Use filters if you frequently change projects or if you use extensive metadata.
You can add multiple filters by clicking the Add another filter link.
Note
It is recommended to use filters if you plan to schedule MDE.
Click Apply filters.
The Projects table displays the selected projects that match the rules that you have set.
Note
After applying filters, you cannot manually adjust the selection of projects.
Select Projects Manually
If you opt to manually select the projects for extraction, perform these steps:
Under the Select projects for extraction section, turn off the Enable advanced settings toggle if not disabled already.
Select the required projects from the list of projects in the Projects table.
Alternatively, you can select projects by searching for the required project from the table using either the project name or any keyword or string in the project name.
After you have selected the projects, your project selection count is displayed above the Projects table.
Run Extraction
Note
The dbt Discovery API has a three-month retention limit, meaning you can only extract data from the past three months.
Under the Run extraction section of the Metadata Extraction tab, click Run Extraction to extract metadata on demand.
The status of the extraction action is logged in the Extraction Job Status table under the MDE Job History tab.
Schedule Extraction
You can also schedule the extraction. To schedule the extraction, perform these steps:
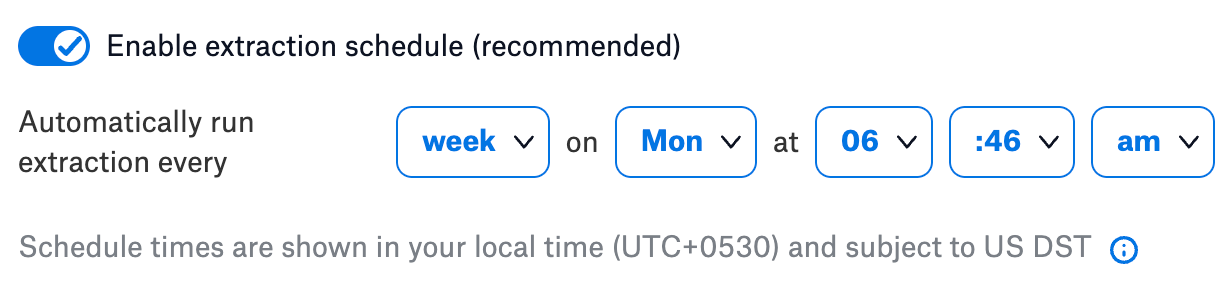
Under the Run extraction section, turn on the Enable extraction schedule toggle.
Using the date and time widgets, select the recurrence period and day and time for the desired MDE schedule. The next metadata extraction job for your data source will run on the schedule you have specified.
Note
Here are some of the recommended schedules:
Schedule extraction to run for every 12 hours at the 30th minute of the hour.
Schedule extraction to run for every 2 days at 11:30 PM.
Schedule extraction to run every week on the Sunday and Wednesday of the week.
Schedule extraction to run for every 3 months on the 15th day of the month.
View the MDE Job History
You can check the status of extraction jobs either after running an extraction manually or when Alation automatically runs metadata extraction based on the schedule.
To view the status of extraction, go to Metadata Extraction > MDE Job History on the Settings page of your dbt Gen2 ELT source. The Extraction job status table is displayed.

The Extraction job status table logs the following status:
Did Not Start - Indicates that the metadata extraction did not start due to configuration or other issues.
Succeeded - Indicates that the extraction was successful.
Partial Success - Indicates that the extraction was successful with warnings. If Alation fails to extract some of the objects during the metadata extraction process, it skips them and proceeds with the extraction process, resulting in partial success.
Failed - Indicates that the extraction failed with errors.
Skipped - Indicates that the extraction job was skipped due to a similar job being in progress.
Click the View Details link to view a detailed report of metadata extraction. If there are errors, the Job errors table displays the error category, error message, and a hint (ways to resolve the issue). Follow the instructions under the Hints column to resolve the error.
In some cases, the Generate Error Report link is displayed above the Job errors table. Click the Generate Error Report link above the Job errors table to generate a .zip archive containing CSV files for different error categories, such as Data and Connection errors. Click Download Error Report to download the files.
After the Metadata Extraction is complete, the Catalog pages for dbt assets will display links to the respective RDBMS objects (Projects > Data Sources, Models -> RDBMS tables, Model Columns -> RDBMS columns.). Also, test data is populated under the Data Health tab of the associated RDBMS tables.